This part of the Magento 2 tutorial is about how to add new categories in Magento 2. We want to address the topic of categories in Magento and teach you where the categories are in the Magento admin panel and how to add a new category in Magento? How to define a subcategory?
Before adding a product to your store, you need to create the main categorization structure of your catalog. Each product must be assigned to at least one category. Categories are usually created before adding products to the store.
However, you can also add categories when creating a product. Store category structures (categories) are displayed in the main menu of the store.
Category in Magento structure
The structure of categories in the main menu can affect the customer experience and performance. As a best practice, it is usually the best to have a main category and avoid having other categories with the same name.
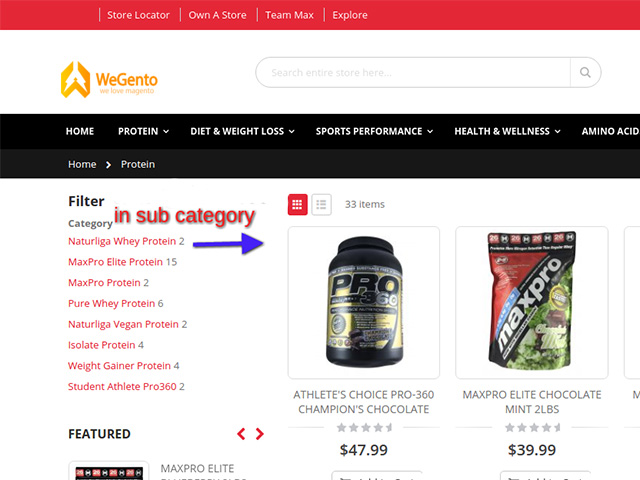
For example, instead of having multiple categories for “women” that the word “women ” is repeated in all categories, such as women’s clothing, women’s shoes, and women’s hats; it is better to make a mother (main) category under the name women and other items related to it be a sub-category.
Related posts: The difference between Magento and WooCommerce
Try to use the same structure for all categories so that users are satisfied with your site and have a better user experience.
The categories in Magento are like an inverted tree with roots at the top and smaller branches at the bottom. You can also drag and drop a sub-branch to another branch or root to turn it into a sub-branch of that category. In the following, we describe how to add new categories in Magento.
Add a new category in Magento
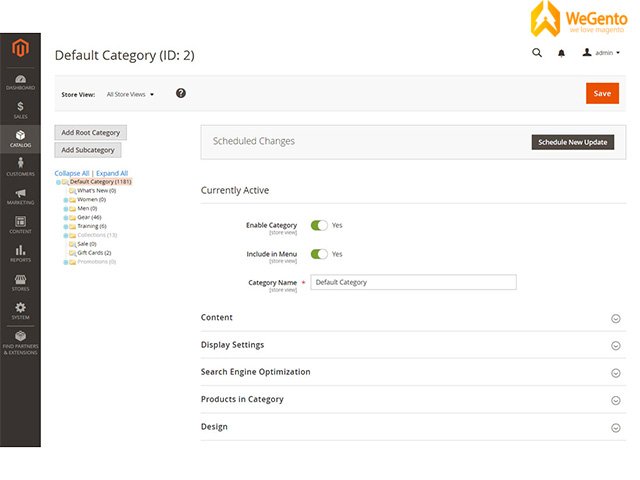
At first, we open our Admin Panel and find the Catalog menu from the sidebar menu, and click on the Categories option. Now we are in the categories section, and here we can do all the necessary actions related to categories.
Related posts: What is Magento?

- Click the Add Root Category button.
- We enter the necessary information.
- If you want this category to be available in the store immediately, set Enable Category to Yes.
- To insert a category in the top menu of the site, set the “Include in Menu” option to “Yes”.
- Enter the category name.
- Save and continue.
To complete the next step of adding new categories click on the Content tab.
- To display the category image at the top of the page, you can upload your own image or use an image that you have already uploaded.
- Click the Upload button to upload an image, or to select a photo from the photos you have already uploaded, click the Select from Gallery button.
- For the Description section, enter the text you want to display on the category page.

Note that you can save changes at any time and then continue.
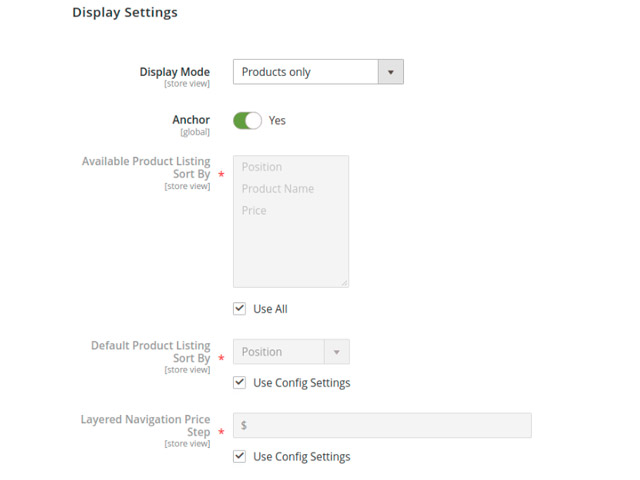
Click the Display Setting tab and set the display mode to one of the following:
- Products only
- Static block only
- Blocks and products
- If you want the categorization page to include a filter based on the feature, set Anchor to Yes.
- By default, sorting is based on everything, but if you want to change it, you have to uncheck the Use All checkbox and select one another or more options.
- By default, the results are sorted by position, and if you want to change, you must uncheck the Use Config Settings check box and use one another of the options as desired.

Click on the Search Engine Optimization Settings tab and fill in the required options.
Click on the Product in the Category and select the products that you want to be in the product category
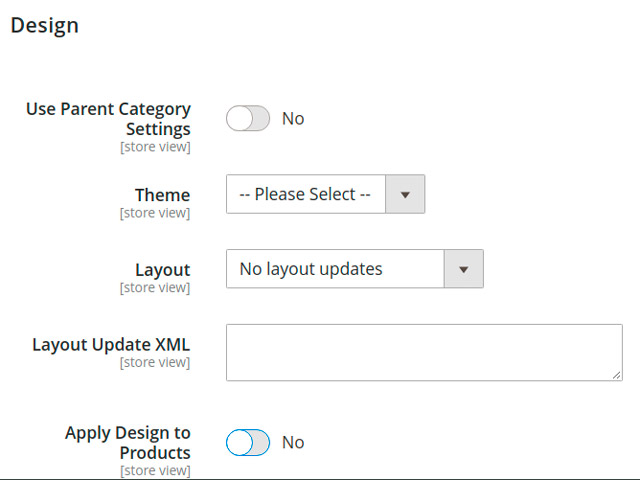
Click on the Design tab
- If you want to use the parent settings, set the Use Parent Category Settings option to yes.
- To change the design of the category pages, select the theme you want to apply.
- To change the layout of the column pages, Select the layout you want.
- To apply design to product pages, set Apply Design to Products to yes.

Last word
At the end of the tutorial on adding new categories in Magento 2, if you want the changes to be updated on a specific date, click on the Schedule Design Update option and select the date.


